
You can now include user expenses in the invoices
When an Expense Can Be Included
An expense is eligible for a new invoice only when **all** of the following conditions are true:
- The Project must be linked to the expense.
- The expense is marked as Billable.
- The expense Approval Status is Approved.
- The expense has an Approved On date.
- The expense is not already linked to another invoice or Invoice Detail record.
- When using Include Expense Details, the Approved On date falls within the selected start and end dates.
Steps to Add an Expense
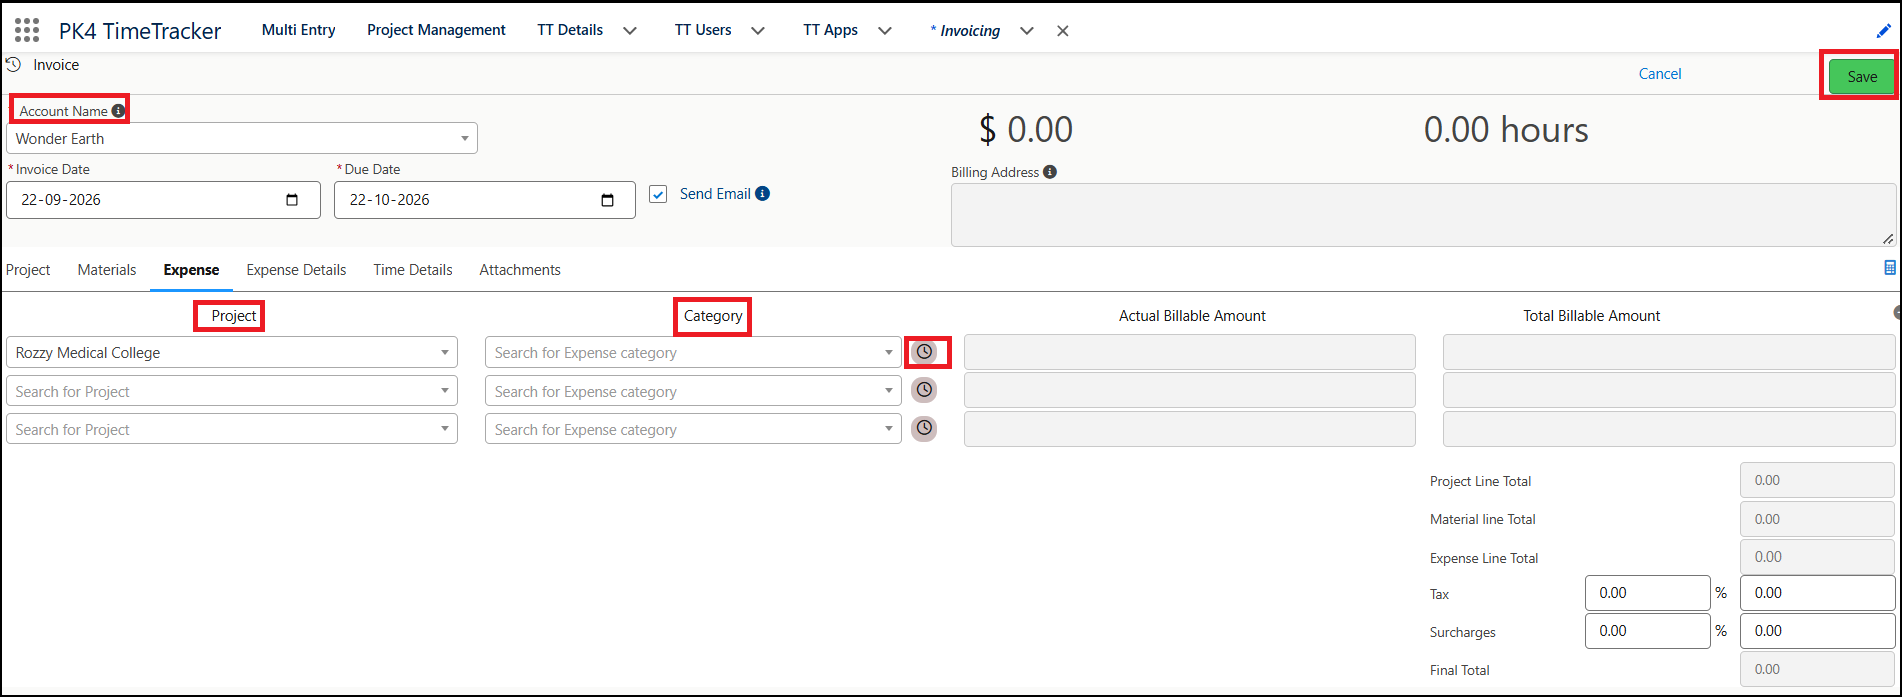
Go to the Invoicing tab and click New Invoice.
On the New Invoice page, select the Account and Project.
Go to the Expenses sub tab, select the Category, and click the Clock icon to view the expenses associated with the selected category.
Select the expense you want to add to the invoice.
The Actual Billable Amount of the selected expense is automatically copied to the invoice. You can edit the Total Billable Amount if required.
To add expenses from a different project, use the next row and select the Project, Category, and the related expenses.
Repeat the above steps to add additional expenses as needed.
Save the invoice.
The selected expenses are now included in the invoice and can be billed to the customer.
Adding Expenses to an Existing Invoice
If an invoice has already been generated, you can add expenses to the invoice by using the Edit Invoice option.
To add expenses to an existing invoice:
- Go to Invoicing.
- Search for and select the invoice to which you want to add expenses.
- Click Edit Invoice.
- Go to the Expenses sub-tab.
- Select the Project and Category, and click the Search icon.
- From the list of expenses, search for the expense you want to add to the invoice.
- Select the required expense and click Save and Close.
- Click Save to save the changes to the invoice.